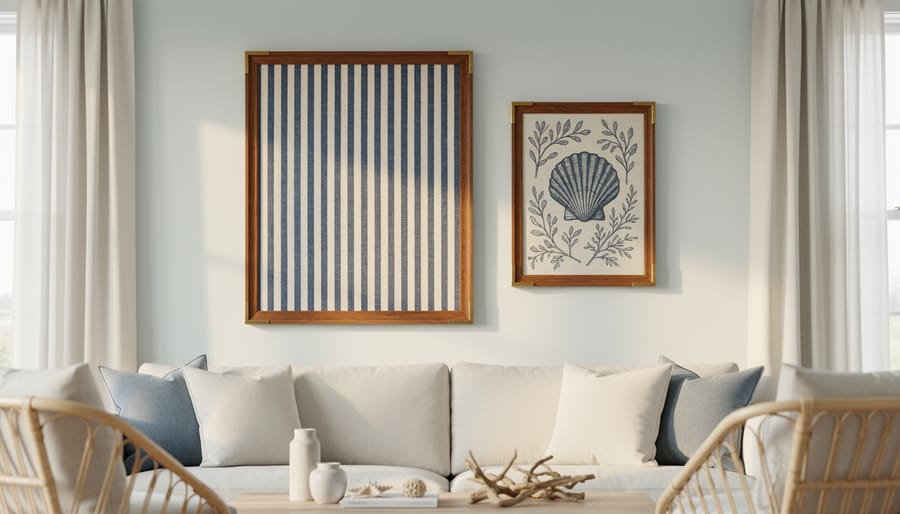
You can turn a piece of fabric into framed wall art in a single afternoon with just a stretched or mounted fabric panel, a frame, and a few basic tools. Pick a fabric with a pattern you love, press it flat, mount it on a rigid backing, and set it in a frame with a little breathing room. Most people finish in two to three hours, and the skill level is firmly beginner.
Why does it work so well? Fabric brings color, texture, and a story to a wall in a way that a mass-produced print can’t. A scrap of faded ticking, a hand-printed linen, or a seashell-motif cotton can anchor a whole room, especially in a coastal or Southern home where soft, lived-in character is the goal. If you’ve been saving heirloom pieces or hunting down vintage Southern textiles at estate sales, framing is a lovely way to give them a place of honor.
The real trick is in the details: how you prep the fabric, keep it taut, and protect it from sun and sag. Get those right and the result looks like a gallery piece instead of a craft project. Below, we’ll walk through the materials, the safety basics, each step in order, and how to check your work before it goes on the wall.
Choosing Fabric and Frames That Suit a Coastal Southern Home
Fabrics Worth Framing
Some fabrics just want to be framed. Look for tightly woven cotton, linen, and canvas-weight pieces, because they hold their shape once stretched and won’t ripple on the wall. Medium weight is the sweet spot, sturdy enough to stay taut but not so thick it fights the frame.
Here are a few favorites for a coastal Southern home:
- Linen brings relaxed, sun-washed texture that feels right at home near the water.
- Ticking and indigo stripes add crisp, classic coastal charm.
- Seersucker offers a puckered, porch-swing look that’s pure summer.
- Botanical and shell prints bring garden-fresh or seaside color.
- Vintage tea towels and heirloom embroidery carry stories along with the stitches.
Pattern scale matters more than you’d think. A big, bold print needs a larger piece to show off its full design, while small florals and tiny stripes look lovely even in a modest frame.
Steer clear of very stretchy knits, loosely woven gauze, and anything fragile or fraying, since those tend to sag, warp, or come apart when pulled tight.
Picking a Frame and Placement
A frame does half the work of making fabric feel like art, so pick it with your room in mind. Canvas stretcher bars give a clean, gallery look with no glass, which suits heavier linen and bold prints. Floating frames leave a small gap around the fabric, so the edges show and the piece seems to hover. A standard picture frame with a mat works well for smaller treasures like a tea towel corner or a bit of embroidery.
For finish, whitewash and weathered wood keep things breezy, while brass adds a little warmth against indigo or botanical prints. If you want a quick refresher, our coastal style basics can help you match frames to your home.
Framed fabric shines in an entryway, up a stair wall, over a bed, or in a gallery grouping.
Tools and Materials to Gather Before You Begin
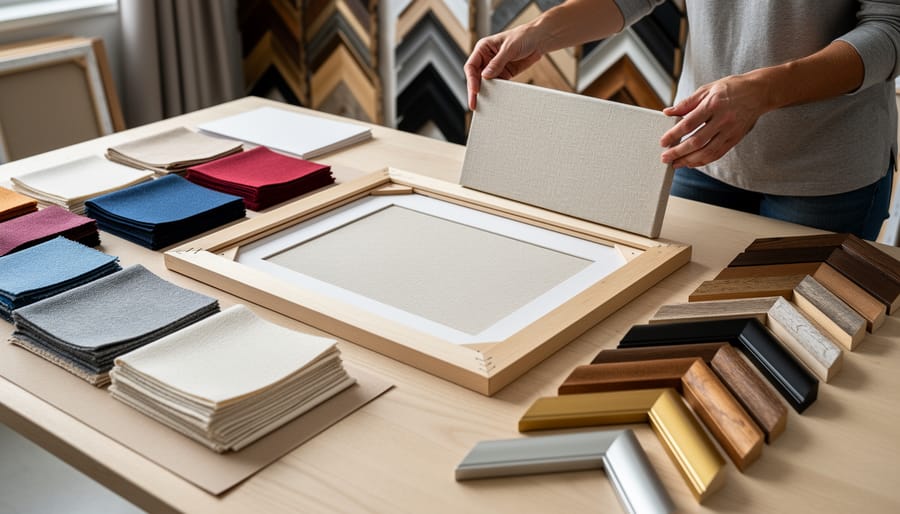
Before you start, take a few minutes to gather everything in one spot. Setting up once means you won’t be hunting for the staple gun with half a yard of fabric draped over your arm. Good news: most of this is probably already hiding in your craft drawer or garage toolbox.
Here’s what you’ll need:
- Your fabric, cut generously larger than the frame opening
- A frame, canvas stretcher bars, or a floating frame sized to your piece
- A rigid backing board, such as foam core or thin plywood
- A staple gun with staples, or strong fabric tape for a no-staple approach
- Sharp fabric scissors
- An iron and ironing board
- A measuring tape or ruler
- A pencil or chalk for marking the center and edges
A few optional extras can make the job easier and the finish prettier:
- Spray starch, to help lightweight linens behave
- Painter’s tape, for holding fabric steady while you work
- A mat board, if you want a crisp border around your fabric
- Picture-hanging wire and hooks, for when it’s time to put it on the wall
- A pair of pliers, for pulling any stubborn staples
Lay it all out on a clean, flat table, and you’re ready to go. Give yourself plenty of elbow room, because fabric has a way of spreading out.
Safety Notes and When to Pause
A little common sense keeps this project fun instead of frustrating. Work on a sturdy table with good light, and keep your fabric, frame, and tools within easy reach so you’re never reaching or rushing.
Staple guns look harmless, but they can fire into a finger faster than you’d think. Keep your free hand well back from the staple path, and unplug or set down the gun when you’re not using it. Iron on a stable board, steer clear of the steam vent, and let the iron cool fully before you tuck it away. Cut with sharp scissors or a fresh blade, always angled away from your body, since dull tools slip and cause more trouble than sharp ones.
Stop and rethink if your fabric is fragile, thin with age, or simply irreplaceable. Grandmother’s hand-stitched linen deserves a gentler approach. Test a scrap if you have one, or talk with a conservator or professional framer before you cut or staple anything.
When it’s time to hang, check the weight rating on your hooks and anchors, and match them to the wall type. A heavier frame belongs on a stud or a proper anchor, never a lone nail.
Step-by-Step: Stretching and Framing Your Fabric
Prepare and Measure the Fabric
Before you staple a single thing, give your fabric a little tender loving care. Wash it gently if it’s colorfast, or simply steam out the wrinkles if it’s delicate or vintage. A good press now saves you a world of puckering later.
- Wash or steam the fabric. Use a cool, gentle cycle, or hover a steamer an inch away, to relax stubborn creases.
- Press at the right heat. Check the fabric’s care label; linen likes it hot, while seersucker and synthetics want a lower setting. Iron on the wrong side when you can.
- Center the design. Lay the fabric over your frame or stretcher bars and shift it until the motif sits just where you want it.
- Measure and mark. Add two to three inches of overlap on every side so you have plenty to wrap and secure.
- Cut with sharp scissors. Cut straight along the grain, and trim slowly so the pattern stays square.
Once everything’s measured and cut, you’re ready to start stretching.
Stretch, Secure, and Frame
Start in the center of each side, not the corners. Pull the fabric snug over your stretcher bars or backing board and put one staple at the top center. Flip it over, tug gently opposite, and add a second staple at the bottom center. Do the same left to right, so you’ve got four anchors holding things steady.
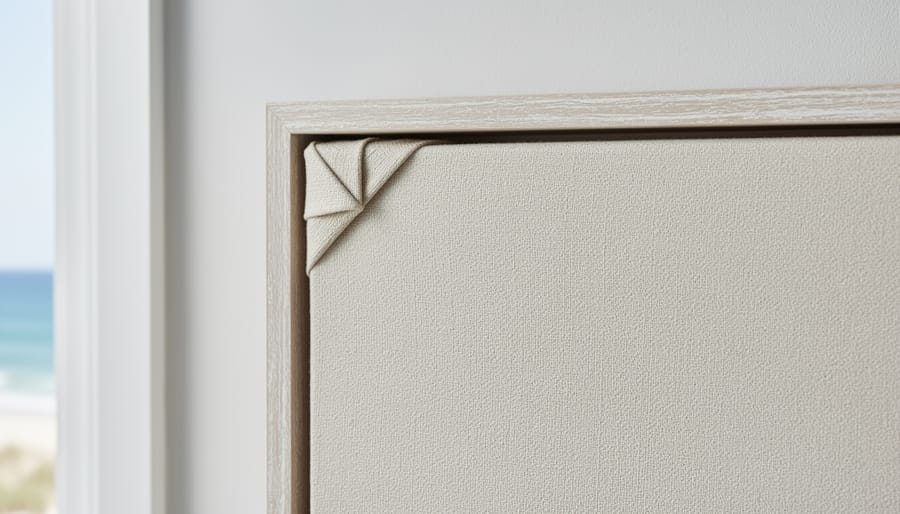
From there, work outward from each anchor in small stretches, stapling every inch or two and keeping the pull firm but never harsh. Alternate sides as you go. That back-and-forth rhythm is what keeps the tension even and your stripes or botanicals running straight. Save the corners for last, folding them neatly like you’re wrapping a gift, then trim away any bulky excess.
Next, tack a sheet of backing paper or thin board over the back for a clean, dust-free finish, then set the piece into your frame and secure it with the points or clips. If you spot a wrinkle or sag, pull out the nearest few staples, re-stretch toward that spot, and restaple. A light steam from a held-back iron relaxes stubborn ripples, too.
Once it’s hanging, it pairs beautifully with other coastal wall décor and if you’re hooked, there’s plenty of more coastal DIY art to try next.
Checking Your Work and Styling the Finished Piece
Quick Quality Check
Before you hang your piece, give it a quick once-over in good light. Hold it at arm’s length, then tilt it to catch any shadows that might reveal trouble.
- The surface is taut with no ripples or sags.
- The pattern runs straight along the frame edges.
- The corners are tidy and the edges aren’t fraying.
- The backing is secure and nothing shifts when you tap it.
- The hanger is rated for the full weight of the frame.
Most problems are easy to fix. Ripples usually mean the fabric needs re-stretching, so pull out a few staples on that side and re-anchor while pulling gently outward. A crooked pattern means starting from the center again. Loose backing just needs a few more staples or fresh tape. And if your hanger is borderline, swap it for a sturdier one before the piece goes on the wall.
Styling Ideas and Where to Go Next
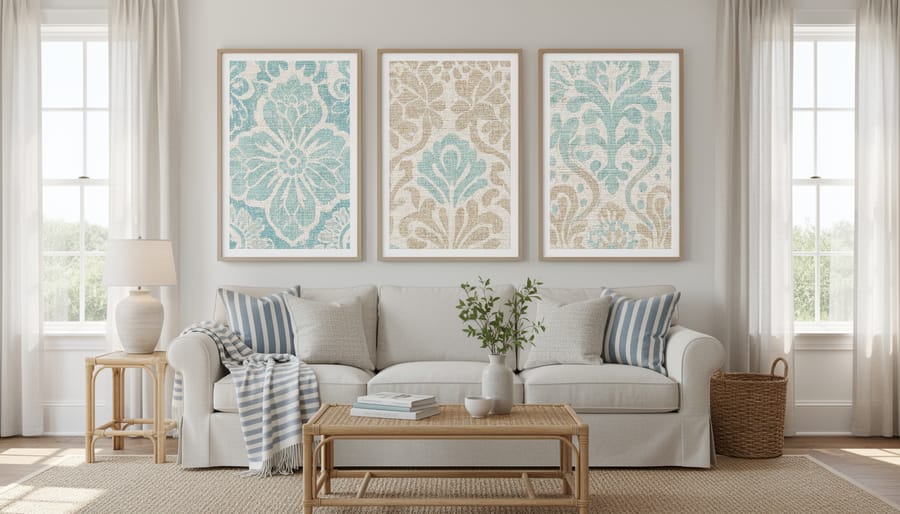
Once your first piece is hanging, think about giving it company. A trio of framed fabrics in graduated sizes makes a lovely gallery grouping, especially when you repeat one color, like indigo or sea-glass green, across all three. Hang them with a couple of inches between frames so the patterns can breathe.
Pair your fabric art with natural textures to keep the look relaxed and coastal. A woven seagrass basket on the console below, a strand of rope draped over a frame corner, or a shelf of shells and driftwood all play nicely with soft linen and ticking stripes.
Don’t toss those scraps, either. Leftover fabric can become a smaller matching piece for a hallway or powder room, or a themed series, say four botanical prints for each season. Swap them out as the year turns, and your walls stay fresh without a big investment.
Framed Fabric Art Questions, Answered
Here are quick answers to the questions folks ask us most.
Do I really need a staple gun?
It makes the job faster and gives the tightest hold, but heavy-duty fabric tape or a hot glue gun can work for lightweight pieces. Whatever you use, keep the tension even from center to edges.
Will framed fabric fade in sunlight?
It can, especially bold dyes and vintage textiles. Hang it away from direct afternoon sun, and consider UV-protective glass for pieces you treasure.
How do I clean it?
Dust it gently with a soft brush or a vacuum on a low setting. Skip liquid cleaners, since moisture can leave water marks on the fabric.
Can I frame stretchy or thin fabric?
Yes, with a little help. Stretchy knits tend to sag over time, and sheer fabrics show whatever sits behind them, so mount either one onto a plain cotton or foam board backing first.
If your question isn’t here, start small with a scrap of fabric and see how it behaves. You’ll learn plenty from one practice piece.
There’s something special about giving a beloved textile a place of honor on the wall. With a little time, a steady hand, and some patience, framed fabric artwork turns your favorite linens, prints, and heirloom scraps into décor that lasts. Keep the fabric taut, work from the center outward, and hang it with care. You don’t need a big project to start. Pick one small piece, pour yourself some sweet tea, and make something you’ll be proud to show off.