You’ve tackled the big decisions, the crib is assembled, walls are painted, and furniture stands ready. But that room still feels a little too catalog-perfect, missing the warmth that makes it truly your child’s space. The solution lies in small personalised touches that transform a generic nursery into a room full of character, typically requiring just an afternoon, basic supplies, and a thoughtful eye for what makes your little one unique.
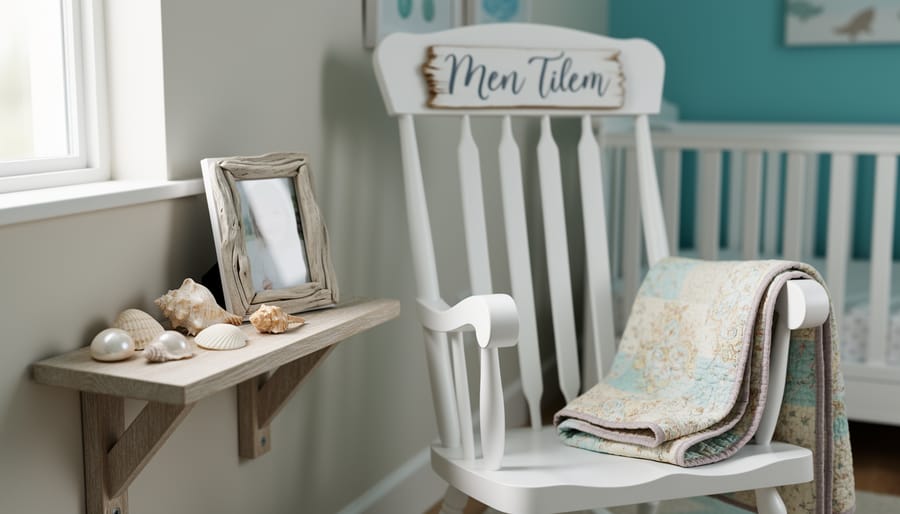
These finishing details matter more than most parents realize. A coastal cottage room with thoughtful personalization feels lived-in and loved, while the same space without those final layers reads cold. We’re talking about the elements that catch your eye when you peek in during naptime, the hand-lettered name above the changing table, the collection of seashells arranged just so on a shelf, the vintage quilt draped over the rocker that belonged to grandmother.
The beauty of these touches is their flexibility. Whether you lean toward classic Southern charm with monogrammed linens and heirloom pieces or prefer a breezy coastal vibe with driftwood frames and soft aqua accents, personalization works within your established aesthetic. Most projects cost under fifty dollars and require no special skills, just patience and intention.
Safety remains paramount even with decorative elements. Every piece you add should be securely mounted, appropriately sized, and positioned well out of reach of curious hands as your baby grows. The goal is creating a space that feels personal without compromising the peace of mind you need when you close that door at bedtime.
What You’ll Need to Personalize Your Child’s Space
The good news is you probably already have many of the items you need tucked away in a closet or garage. Most finishing touches require simple, affordable supplies rather than specialized equipment or expensive materials.
Before you start your personalization projects, gather your supplies by category. This approach helps you see what you already own and what you might need to pick up on your next trip to the hardware store or craft shop.
- Wall displays: picture frames in various sizes, adhesive hooks, Command strips, a level, pencil, painter’s tape for marking positions, small nails or picture hangers
- Textile additions: fabric scissors, iron-on letters or patches, fabric glue, needle and thread for simple hems, curtain clips or rings
- Functional accents: decorative bins or baskets, label maker or printable labels, drawer organizers, personalized hooks, switch plate covers
- Craft projects: wooden letters for names, acrylic paint and brushes, mod podge or clear sealer, ribbon or trim, scrapbook paper for backing frames
Most of these items come from your local home improvement store, craft retailer, or big-box shop. Skip the specialty boutiques unless you are looking for something specific like custom items from Monogram Shop which can add that extra-special personalized element.
Keep your budget in mind as you shop. A few well-chosen finishing touches make more impact than a dozen rushed additions. Start with one or two projects, see how they transform the space, then add more as inspiration strikes. You will find that many supplies pull double duty across multiple projects, so your initial investment stretches further than you might expect.
Important Considerations Before You Begin
Before you start hanging those sweet monogrammed letters or setting up a gallery wall, take a moment to think through safety and practicality. These finishing touches should enhance your child’s room without creating hazards or headaches down the road.
Age matters tremendously when choosing personalized items. What works beautifully in a teenager’s room could pose serious risks for a toddler. Avoid small decorative objects, buttons, or removable embellishments that could become choking hazards for children under three. Even older children benefit from thoughtful placement, keep heavy framed artwork away from cribs and low beds where a fall could cause injury.
If you’re renting or simply want flexibility as your child grows, damage-free mounting solutions are your best friends. Command strips, removable adhesive hooks, and tension rods let you personalize without losing your security deposit or patching holes later. Test these products on an inconspicuous spot first to ensure they won’t pull paint when removed.
Check that personalized textiles meet current flammability standards, especially items near lighting or heating elements. Inspect purchased items for loose threads, weak seams, or poorly attached decorative elements that could come apart with normal use. The goal is creating a space that feels special and stays safe as your little one explores every corner of their finished room.
Step-by-Step: Creating a Personalized Name Display
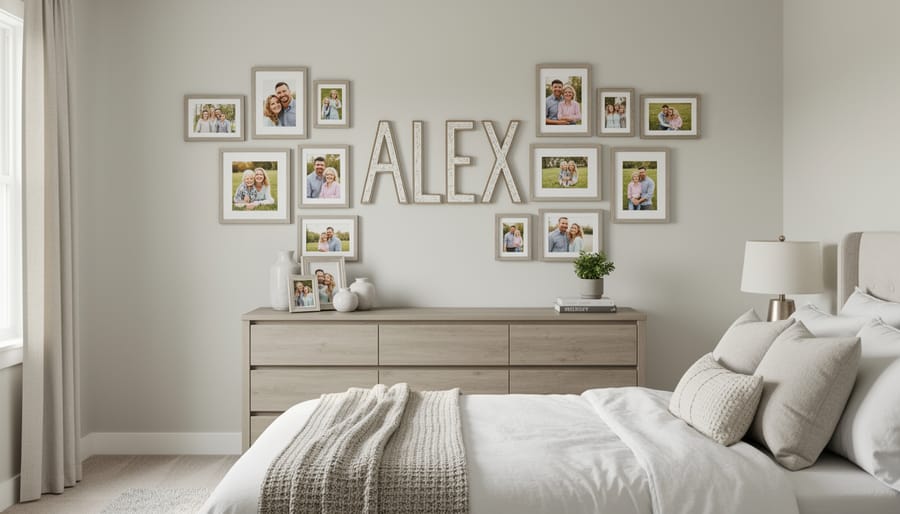
Creating a personalized name display gives your child’s room that finished, intentional look that says “this space was made for you.” This single addition transforms a generic bedroom into a truly personal sanctuary, and it’s easier to accomplish than you might think.
Start by standing in the doorway and identifying the natural focal point, typically the wall above the bed or the first wall you see when entering. You want the display at a height where your child can appreciate it: roughly 48 to 60 inches from the floor for younger children, higher for teens. Mark a light pencil dot at your chosen center point, then step back to confirm it feels balanced with the existing furniture.
Next, select your display style based on your room’s aesthetic and your comfort level with installation. Wooden letters offer dimension and work beautifully with coastal colors like soft aqua or weathered white. Framed prints provide a cleaner look and require just one or two nail holes. Fabric banners add softness and Southern charm, especially in classic patterns like gingham or seersucker. Consider your child’s age too, three-dimensional letters suit older children, while framed art is safer for toddlers who might climb.
- Measure your child’s name in your chosen letters or frame, accounting for spacing between letters (typically one to two inches).
- Cut paper templates matching each letter’s size and tape them to the wall, adjusting until the arrangement looks centered and level.
- Mark mounting points lightly with a pencil through or beside each template.
- Remove templates and install appropriate hardware, adhesive strips for lightweight items, anchored screws for heavier wooden letters.
- Mount each letter or frame, checking level as you go, and step back frequently to verify alignment.
For that Southern touch, consider classic serif fonts that echo traditional family monograms, or incorporate coastal hues that complement your existing color scheme. A name display in soft Charleston green or weathered driftwood finish feels both personal and timeless, growing with your child while anchoring the room’s finished design.
Adding Character Through Photo and Art Displays
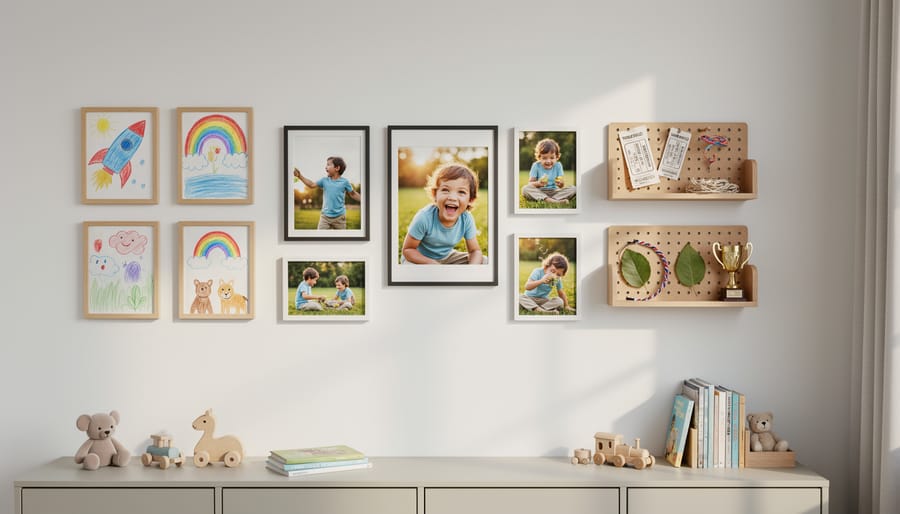
Photos and artwork transform a child’s room from simply decorated to deeply personal. Start by gathering a mix of family photos, your child’s artwork, and meaningful prints that reflect their interests and your family’s story.
A gallery wall works beautifully in children’s spaces when you keep it simple. Choose frames in coordinating coastal tones, whites, soft blues, or natural wood, to create visual harmony. Mix frame sizes, but maintain consistent matting or frame style to avoid a cluttered look. Include at least two pieces of your child’s own artwork alongside family photos. This validates their creativity and makes the display truly theirs.
For younger children who create art constantly, install a rotating display system. Clipboards mounted at their eye level or a simple wire with clothespins lets them showcase current favorites and swap pieces easily. This keeps the room fresh and gives them ownership of their space.
Cultural storytelling through art connects children to their heritage. Display a framed map of your coastal region, vintage family photos from beach vacations, or prints featuring local wildlife. If you have family quilts or needlework from previous generations, frame a small section or hang the piece where your child can appreciate the craftsmanship.
Framed fabric wall art offers another layer of personalization, fabric in patterns your child loves or colors that complement the room’s palette adds texture and warmth.
Position artwork at your child’s viewing height, not adult eye level. They should be able to see and point to the photos and pieces that matter to them. This makes the display an active part of their daily experience rather than just decoration overhead.
Textile Touches That Make a Difference
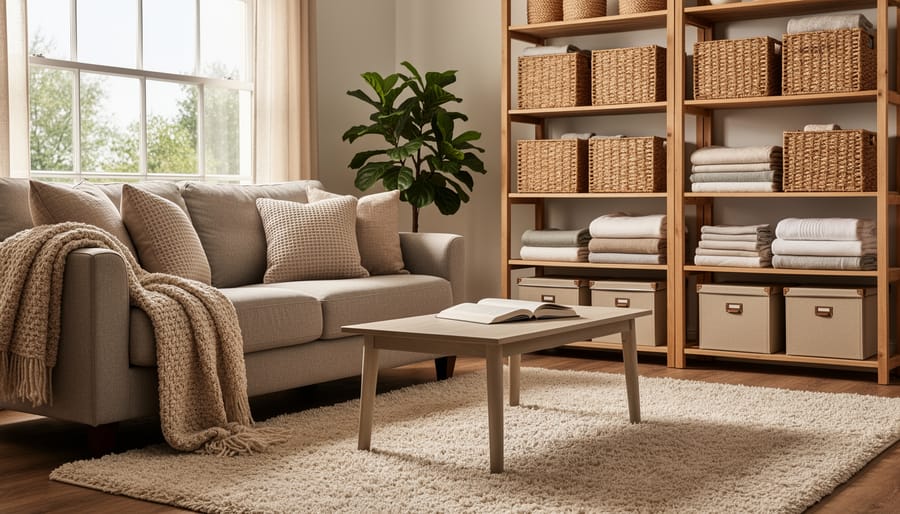
Soft furnishings offer one of the easiest ways to add personality without permanent changes. A monogrammed throw pillow on the reading chair or bed immediately signals whose space this is, while keeping the room cozy and inviting. Look for embroidered initials in colors that complement your existing palette, think seafoam greens, sandy neutrals, or soft coral shades that echo coastal sensibilities.
Personalized throws serve double duty. A cotton blanket with your child’s name stitched along the edge adds warmth for chilly evenings while reinforcing their ownership of the space. Choose washable fabrics that can handle daily use, and avoid overly delicate materials that won’t survive spills or fort-building adventures.
Fabric growth charts have become a charming alternative to marking doorframes. These roll up for storage, move with you if you relocate, and often feature designs from whimsical nautical themes to classic Southern botanicals. Hang them in a visible spot where your child can watch their progress, it becomes both decoration and treasured keepsake.
Window treatments offer subtle personalization opportunities too. Valances with your child’s initial, curtain tiebacks in their favorite color, or even simple panels in patterns they helped select make the room feel intentionally designed for them. The key is choosing textiles that feel special without overwhelming the space, two or three personalized pieces create impact, while too many compete for attention and clutter the visual field.
Functional Personalization: Storage and Organization
Organization doesn’t have to look generic when you personalize it with the same care you’d give any other finishing touch. Custom labels and nameplate hooks transform everyday storage into elements that complete your child’s room while actually keeping the space tidy.
Start with labeled bins and baskets in your child’s favorite colors, coastal blues and greens work beautifully in Southern homes while appealing to many children. Use a label maker or hand-lettered tags to identify what belongs where: “Building Blocks,” “Art Supplies,” “Dress-Up Clothes.” For younger children who can’t read yet, add simple picture labels alongside the words. This approach works whether you’re using wicker baskets or modern cube storage.
Personalized hooks make a real difference. Instead of plain pegs, choose decorative hooks shaped like nautical elements, animals, or monogrammed options with your child’s initial. Mount them at your child’s height so they can actually reach their towels, backpacks, or pajamas. A row of named hooks, “Emma’s Coat,” “Emma’s Bag”, encourages independence while looking intentional.
Custom closet organization elevates storage built-ins from purely functional to personal. Add fabric tags to shelf dividers indicating “School Uniforms” or “Sunday Best.” Use coordinating hangers in a signature color rather than mismatched plastic ones. Even drawer dividers can incorporate your child’s chosen theme through color or pattern.
The goal is making organization feel like part of the room’s design, not an afterthought. When storage solutions reflect your child’s personality, they’re more likely to use them, and the room stays both finished-looking and functional.
Small Details with Big Impact
Sometimes the tiniest details create the most noticeable difference in finishing a child’s room. These quick additions take minutes to install but instantly communicate that this space belongs to someone special.
Start with personalized light switch covers, an unexpected spot that gets daily use. You can find custom plates printed with the child’s name, favorite colors, or even coastal motifs like seashells or sailboats. They replace standard builder-grade covers and add a personal touch every time someone enters the room.
Door hangers transform an ordinary entrance into a welcoming threshold. Choose wooden signs with the child’s name, fabric hangers they helped decorate, or chalkboard-style versions where they can write messages. These accessories that pop without demanding much wall space or budget.
Consider these other high-impact finishing touches:
- Custom drawer pulls on dressers or nightstands in shapes meaningful to the child
- Personalized bookends that keep shelves tidy while displaying their interests
- A nameplate mounted at child height on the door or wall
- Special bedside reading light in their favorite color or character
- Decorative hooks shaped like animals or initials for hanging bags or hats
The beauty of these small personalizations lies in their flexibility. They’re easy to swap as tastes change, simple enough that children can help choose them, and affordable enough to refresh seasonally without guilt.
Checking Your Work and Final Adjustments
Once you’ve added your personalised touches, step back and look at the room from different angles, including from your child’s height. Get down on their level to see what catches their eye and ensure nothing feels overwhelming or unsafe from that perspective.
Give mounted items the “tug test”, gently pull on frames, shelves, and wall decorations to verify they’re secure. Check that command strips are fully adhered and that hanging items won’t come loose if bumped during play. For rooms with toddlers or active children, this step isn’t optional.
Walk through the room and consider whether each personalised touch serves a purpose or brings genuine joy. If something feels like it’s just filling space, it probably is. The goal is a room that feels intentionally finished, not decorated to the edges. Sometimes the most polished look comes from restraint.
Plan to reassess seasonally or when you notice your child’s interests shifting. Swap out artwork, rotate photo displays, or update storage labels as they grow. A truly finished room evolves with your child rather than staying frozen in time, and those small updates keep the space feeling current and loved.
Common Questions About Personalizing Children’s Rooms
Parents often have similar worries when it comes to finishing their child’s room, especially when balancing personalization with practical constraints. Here are answers to the most common questions about adding those final special touches.
How much should I budget for personalizing a child’s room?
You can create meaningful finishing touches for as little as $50 to $150 by focusing on DIY options, thrift store frames, and simple additions like personalized door hangers or custom labels. Higher budgets allow for custom name displays and monogrammed textiles, but heartfelt personalization doesn’t require spending a lot.
What are good rental-friendly personalization options?
Command strips, removable wall decals, freestanding name letters, picture ledges that don’t require drilling, and personalized textiles all work beautifully in rentals. These options let you create a finished, personal space without risking your security deposit.
How many personal items are too many?
When the room starts feeling cluttered rather than curated, you’ve crossed the line. Aim for three to five personalized focal points (like a name display, gallery wall, and custom storage), then add smaller touches sparingly to avoid overwhelming the space.
How do I update personalizations as my child grows?
Choose some permanent elements like quality wooden name letters that age well, then layer in easily changeable items like artwork, throw pillows, and decorative accessories. This approach lets you refresh the room’s personality without starting from scratch every few years.
Many parents also wonder about balancing personalization with resale value. The truth is, easily removable personal touches don’t affect your home’s value, and they make the space livable and loved right now. If siblings will eventually share the room, stick with items celebrating each child individually rather than room-wide themes, making future transitions smoother. Your child’s room should feel like theirs today, not preserved for some hypothetical future buyer.
Those small touches you’ve added, the personalized name display, the photo gallery, the monogrammed throw, they’ve done something special. They’ve turned four walls into your child’s own cherished space, a room that reflects who they are right now and honors where they come from.
The beauty of these finishing details is that they’re never truly finished. As your little one grows, their interests will shift, their artwork will evolve, and new memories will find their place on those walls. That’s exactly as it should be. The best children’s rooms grow alongside the children who live in them.
Don’t hesitate to let your child be part of choosing these touches. Their input matters, even if it means adding that unexpectedly bright pillow or creating space for their latest passion. These details celebrate their individuality while weaving in the family traditions and Southern roots that ground them.
You’ve created more than a finished room. You’ve built a space where your child feels seen, valued, and at home.