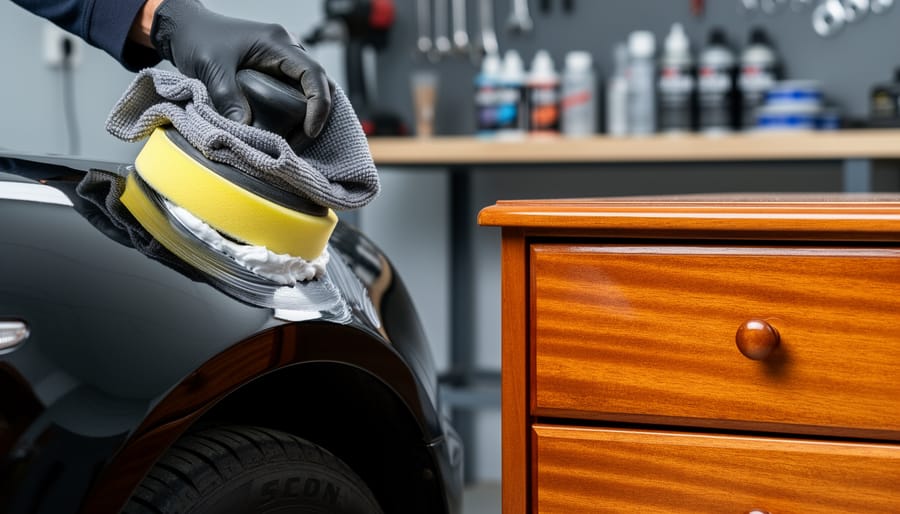
Polishing compounds restore faded gloss on car paint and lacquered furniture by using fine abrasives to remove oxidized layers and micro-scratches, then refining the surface to reflect light uniformly. The process typically takes 30 to 90 minutes per project, depending on surface size and damage severity, and requires only moderate skill with the right products and tools.
The science behind this restoration is straightforward. When paint or lacquer fades, it’s usually because the top microscopic layer has oxidized or developed tiny scratches that scatter light instead of reflecting it cleanly. Think of it like a windowpane that’s dusty versus one that’s crystal clear. Polishing compounds work in stages, starting with slightly more aggressive formulas that level the surface, then progressing to finer compounds that create that mirror-like finish we associate with showroom cars and heirloom furniture.
What makes this technique so valuable for those of us who love maintaining beautiful spaces is its versatility. The same basic principles apply whether you’re breathing new life into your vintage coastal cottage dresser or bringing back the shine on your daily driver parked under the Southern sun. The chemistry doesn’t care if it’s automotive clear coat or furniture lacquer; oxidation is oxidation, and the solution remains consistent.
Both applications share a common foundation, though the specific products and techniques diverge in important ways. The cutting and polishing compounds designed for automotive use tend to work faster and more aggressively, while furniture formulas require gentler handling to preserve delicate finishes. Car Care Products carries the Menzerna automotive range, and it is worth reading the cut rating on the bottle rather than inferring it from the name, because one brand can span a light finishing polish and a heavy correction compound.
Understanding What Causes Gloss to Fade
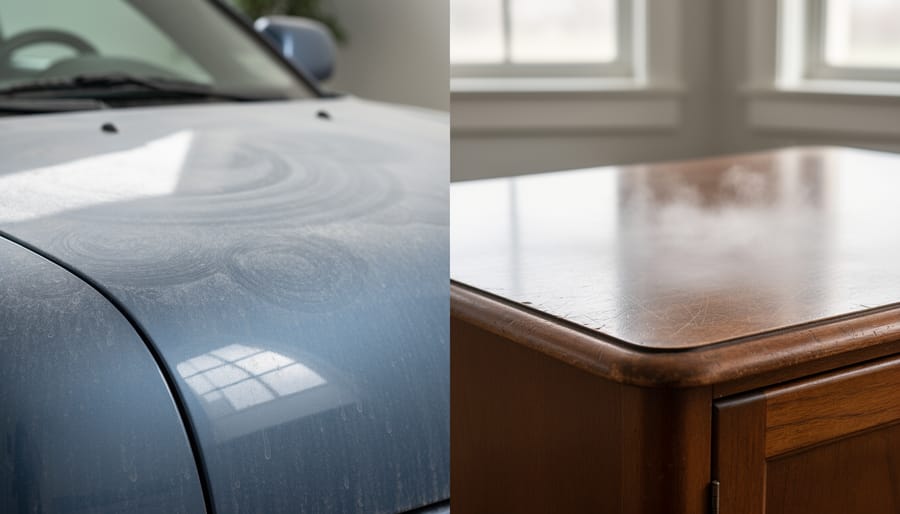
That gorgeous shine on your car’s hood or your grandmother’s mahogany sideboard doesn’t disappear overnight. The culprit is a slow chemical battle happening right on the surface, and understanding it helps you reverse the damage.
UV rays from sunlight are the primary villain. When ultraviolet light hits a glossy finish, it breaks down the chemical bonds in the clear coat or lacquer layer. Think of it like the sun fading a curtain, except it’s happening at the molecular level. This breakdown weakens the protective layer and creates a chalky, oxidized surface that scatters light instead of reflecting it cleanly. Your car parked in the driveway and that console table by the sunroom window face the same relentless assault.
Oxidation works hand-in-hand with UV damage. Oxygen molecules react with the degraded finish, creating a dull, clouded layer. You’ve seen this on neglected cars that look milky white in spots, or antique furniture that’s lost its depth. The finish isn’t gone, it’s chemically altered into something that can’t reflect light properly anymore.
Environmental contaminants accelerate the problem. Tree sap, bird droppings, salt spray from coastal air, pollen, and industrial fallout all contain acids or chemicals that etch into the surface. These create microscopic pits and stains that compound the dullness. In the South, our humidity and heat make these contaminants even more aggressive.
Then there’s the cumulative effect of micro-scratching. Every wash with a dirty sponge, every dust cloth dragged across furniture, every brush against a shrub puts hairline scratches into the finish. Individually invisible, thousands of these scratches create a hazy surface that diffuses light instead of bouncing it back as a mirror-like gloss.
Here’s the good news: because car paint and furniture lacquer are chemically similar protective coatings, they fail the same way and respond to the same restoration approach.
How Polishing Compounds Actually Work
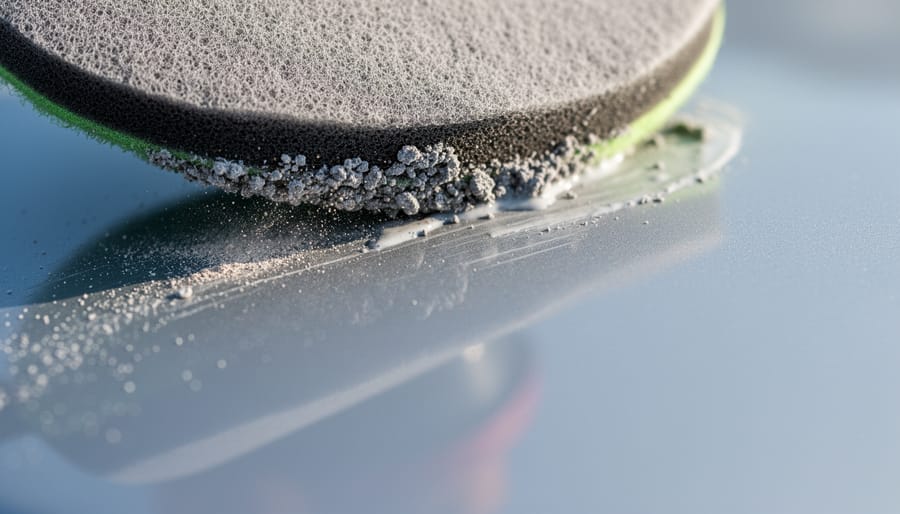
Polishing compounds work through a surprisingly elegant process: controlled abrasion. Think of it as giving your finish a microscopic makeover, where tiny particles gently shave away the damaged top layer to reveal fresh, glossy material underneath. Whether you’re working on your truck’s hood or Grandma’s walnut sideboard, the science remains the same.
The magic happens through three key components working in concert. First, abrasive particles, usually aluminum oxide, cerium oxide, or silica, act like microsandpaper. These particles are measured in microns, with coarser compounds using larger grit and finishing compounds using particles finer than talcum powder. As you rub the compound across the surface, these abrasives physically remove oxidized paint or lacquer, along with the embedded contaminants that make finishes look dull and chalky.
The compound’s ingredients each play a specific role in bringing back that showroom shine:
- Abrasive particles remove oxidized layers and level surface irregularities
- Cutting agents (chemical solvents) help break down stubborn oxidation and enhance abrasive action
- Lubricating oils reduce friction and heat buildup during application
- Carrier oils suspend the abrasives and allow smooth, even distribution
- Conditioning agents restore flexibility to the remaining finish and enhance depth
These components work together to create what professionals call “leveling”, the abrasives cut down the high spots created by micro-scratches while the oils fill in tiny valleys, creating an optically smooth surface that reflects light uniformly instead of scattering it.
Compounds come in grades ranging from heavy-cut to ultra-fine finishing formulas. Heavy-cut compounds (1500-2000 grit) tackle serious oxidation and scratches but leave a haze that requires follow-up. Medium compounds (2500-3000 grit) handle moderate fading, while fine compounds (4000+ grit) perfect the finish and maximize gloss. The grading system works identically for automotive clear coats and furniture lacquer because both are essentially hardened polymer surfaces, the chemistry doesn’t care whether it’s protecting sheet metal or mahogany.
The beauty of this process is its precision. Unlike stripping or refinishing, you’re removing only microns of material, preserving the integrity of the original finish while eliminating the damage that dulled it.
What You’ll Need: Tools and Materials
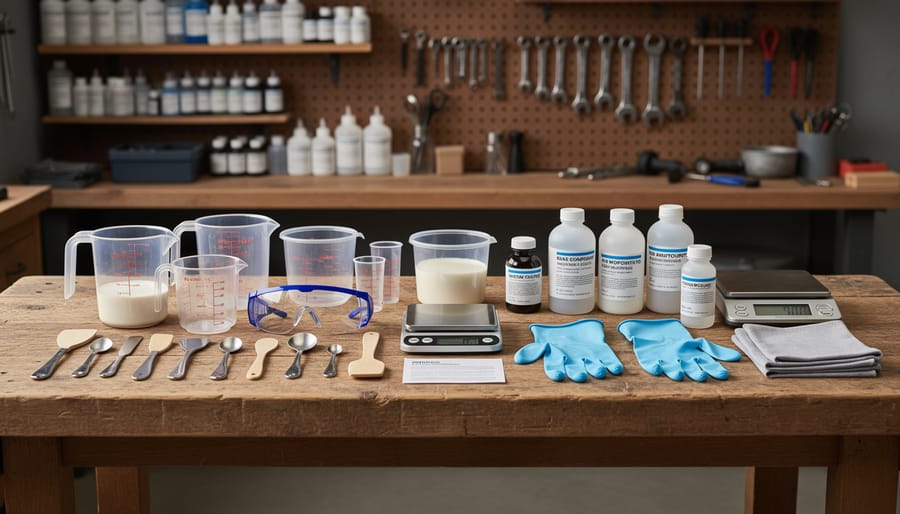
Before you start any restoration work, gather your supplies and set up a comfortable workspace, ideally a shaded carport, covered porch, or well-lit workshop where you can spread out without worrying about direct sun hitting wet compound. Having everything within arm’s reach makes the actual polishing smoother and keeps you from tracking product through the house hunting for that one missing cloth.
Essential Supplies for Both Projects:
- Polishing compounds in multiple grades: coarse (heavy oxidation), medium (general restoration), and fine (finishing polish)
- Microfiber cloths: at least a dozen clean, lint-free towels for application and buffing
- Foam applicator pads: various densities for hand application
- Isopropyl alcohol or degreaser for surface prep
- Masking tape to protect trim, rubber seals, and furniture hardware
- Bucket of clean water and separate washing supplies
Optional Power Tools (Speed Up Larger Jobs):
- Dual-action orbital buffer with backing plates (safer for beginners than rotary polishers)
- Foam buffing pads in cutting, polishing, and finishing grades
- Extension cord rated for outdoor use
Finishing and Protection Products:
- Automotive wax or sealant for car paint
- Furniture wax or topcoat appropriate for lacquer finishes
- Clay bar kit if working on automotive paint (removes embedded contaminants first)
For furniture work specifically, grab some painter’s plastic to protect the floor beneath your piece, compound can splatter farther than you’d think. Car projects benefit from wheel chocks and a good stool so you’re not bending over the hood for an hour straight. If you’re working in typical Southern humidity, having a fan nearby helps products cure properly without rushing the process. Don’t skimp on the microfiber towels; cheap ones shed fibers that defeat the whole purpose of achieving that glassy finish.
Safety First: Important Warnings and Precautions
Before you start buffing away at that oxidized paint or dull lacquer, take a moment to set yourself up safely. Polishing compounds might seem harmless, but they create fine dust, generate heat, and can damage finishes permanently if you’re not careful. A little preparation protects both you and your prized possessions.
Work in a space with good airflow. Polishing compounds release fine particles that you don’t want to breathe for extended periods, particularly when using power tools that atomize the product. Open garage doors or workshop windows, and if you’re working indoors on furniture, run a fan to keep air moving. On humid Southern days, good ventilation also helps compound residue dry properly rather than turning gummy.
Protect everything around your work area. Compound splatter travels farther than you’d expect, especially with an orbital buffer. Lay down drop cloths under furniture pieces, and when working on a car, tape off trim, rubber seals, and plastic components. These materials can absorb compound oils or get stained by pigmented products. Cover nearby items you care about, because dried compound on porch furniture or workshop benches is a pain to remove later.
If you’re using a power buffer, watch for heat buildup. Keep the pad moving constantly and don’t press hard. Excessive friction generates enough heat to damage clear coat or soften lacquer, leaving swirl marks or haziness that’s worse than what you started with. Your hand should feel mild warmth on the surface, never hot.
Pay attention to edges, corners, and raised details on furniture. Power tools cut through thin finish faster in these spots, and once you expose bare wood or paint, there’s no quick fix. Work those areas by hand with lighter pressure.
Know when to stop. If you see a color change, matte patches appearing, or the shine getting worse instead of better, you’ve gone through the protective clear layer. At that point, more polishing only causes harm. Back away and assess whether professional refinishing is needed instead.
Step-by-Step: Restoring Faded Car Paint
Start on a cool morning or wait until the sun dips behind your house, working in direct sunlight will dry the compound too quickly and make buffing harder. Park in a shaded spot where you can walk completely around the vehicle. You’re looking at about two to three hours for a sedan, longer for larger vehicles.
- Wash the entire car thoroughly with automotive soap, then dry it completely with microfiber towels. Any dirt left behind will scratch the paint during polishing.
- Use a clay bar with lubricant spray to remove embedded contaminants, run your hand over the paint first, and you’ll feel the rough texture. After claying, the surface should feel smooth as glass. This takes 30-45 minutes but makes a dramatic difference in your final results.
- Inspect the paint condition closely to choose your compound grade. For moderate fading and light oxidation, start with a medium-cut compound. If the paint feels chalky or shows heavy weathering (common with salt air protection neglect), begin with a heavier cutting compound, then follow with a finer polish.
- Work one panel at a time, hood, roof, door, fender. Apply a quarter-sized amount of compound to a foam applicator pad or buffing pad if using a dual-action polisher.
- Spread the compound gently across the panel first without pressure, then begin working it in with overlapping circular or cross-hatch motions. If buffing by hand, use moderate pressure and consistent movement. With a machine, keep the pad flat against the surface and moving, never let it sit in one spot, which generates heat and can burn through the clear coat.
- Buff each section for 2-3 minutes until the compound begins to turn clear or hazy. You’ll see the oxidation and dullness lifting away in real time.
- Wipe off the residue with a clean microfiber towel, turning to fresh sections frequently. Check your work, the paint should look noticeably deeper and glossier.
- Move systematically around the vehicle, completing one panel before starting the next. Don’t rush the process.
Living on the coast means you’re battling humidity that can make compounds dry unevenly. Following proven coastal humidity tips keep your compound container closed between applications and mist the panel lightly with water if the product starts grabbing or getting tacky before you’ve finished buffing, this extends working time without compromising results.
After completing all panels, step back and examine the entire car under good lighting. Look for streaks, missed spots, or areas where oxidation remains. These will stand out now that the rest of the paint glows. Address any problem areas with a second, lighter application, using less compound and focusing only where needed.
The transformation from chalky, lifeless paint to deep, reflective gloss happens right before your eyes. Your vehicle will look years younger, and you’ll have the satisfaction of doing skilled work yourself rather than paying hundreds at a detail shop.
Step-by-Step: Reviving Lacquered Furniture
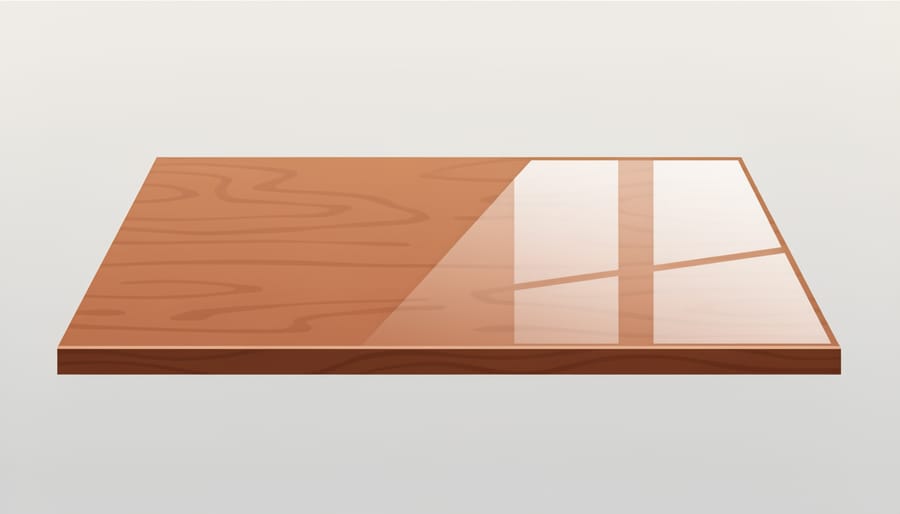
Start by clearing everything off the furniture piece and moving it to a well-lit workspace where you can walk around all sides. Wipe down the entire surface with a barely damp microfiber cloth to remove dust and loose debris, then let it dry completely. This initial pass reveals the true condition of the lacquer, you’re looking for dull spots, hazing, or areas where the finish has lost its depth rather than outright damage like cracks or peeling.
Pick a fine-grade polishing compound specifically designed for furniture or automotive finish work. Lacquered furniture requires a gentler touch than car paint because the finish layers are often thinner, especially on heirloom pieces that may have been refinished decades ago. If you’re working on a treasured sideboard or dining table passed down through generations, err on the side of caution with the finest grade available. Test your chosen compound on an inconspicuous spot, the underside of a tabletop or inside edge of a leg, and wait ten minutes to ensure it doesn’t soften or cloud the finish.
- Apply a small amount of compound to a clean, soft microfiber applicator pad, about the size of a nickel for a large surface, less for smaller pieces.
- Work the compound into the finish using light, circular motions, always moving with the wood grain on the final pass to maintain the natural flow of the piece.
- Focus on one manageable section at a time, roughly two square feet, keeping the pressure gentle and consistent, you’re polishing, not scrubbing.
- Pay extra attention around edges, carved details, and inlays by switching to a softer cloth or even a cotton swab, reducing pressure to avoid cutting through the finish where it’s naturally thinner.
- After working each section for two to three minutes, immediately wipe away the compound residue with a fresh microfiber cloth before it hazes or dries, turning the cloth frequently to a clean side.
- Step back and check your progress under different lighting angles, natural window light and overhead lighting both reveal different aspects of the restored gloss.
The lacquer should start showing a deeper, richer tone as you remove the oxidized layer. If you see the wood grain becoming more distinct and the surface reflecting light more evenly, you’re on the right track. Unlike car paint where you might make multiple aggressive passes, furniture finishing rewards patience. One thorough, gentle pass often does the job, and rushing with heavy pressure risks burning through to bare wood at corners and edges.
Work methodically across the entire piece, maintaining the same pressure and technique. Coastal humidity actually helps here, the moisture in the air keeps the compound from drying too quickly, giving you more working time. When you’ve covered every surface, do a final inspection with a bright light held at an angle to catch any missed spots or uneven areas that need a light touch-up.
Checking Your Work: How to Verify the Restoration
Step outside or move to natural light, you need honest illumination to see what you’ve actually accomplished. Overhead fluorescents hide flaws that daylight reveals. Run your clean hand across the surface. Restored paint and lacquer should feel glass-smooth, with no drag or rough patches.
Now the water test. Sprinkle a few drops on the surface. Fresh, healthy finishes bead water into tight spheres that roll off easily. If water spreads flat, you’ve removed oxidation but haven’t sealed the surface yet, that’s your cue to apply wax or sealant. On furniture, a proper finish repels moisture the same way.
Check the gloss from multiple angles. Squat down and look along the surface. Restored areas should reflect light uniformly without dull patches or streaky halos where compound wasn’t fully removed. Cloudy spots mean residue remains, wipe again with a clean microfiber cloth.
Compare the worked area directly against an untreated section if possible. The contrast tells you whether you’ve hit the mark or need another pass. On furniture, inspect carved details and edges where compound tends to hide.
A second polishing is safe if the surface still feels smooth to touch. Stop immediately if you see haziness that won’t buff out, color changes, or any softness, you’re cutting too deep. The same careful approach that helps you protect outdoor finishes applies here. Understanding coastal maintenance challenges makes you a better judge of when to quit while you’re ahead.
Protecting Your Newly Restored Finish
You’ve put hours into bringing back that showroom shine, and now it’s time to lock it in. Think of protection like putting a proper roof on a house, it’s what makes all that hard work last.
For your car’s paint, seal the restored finish within 24 hours while the surface is still pristine. A quality carnauba wax gives that warm, deep glow Southerners appreciate and lasts three to four months with regular washing. If you’re willing to invest more, ceramic coatings provide two to five years of protection and make washing easier, worth considering in our humid climate where contaminants stick like molasses. Apply your chosen sealant in a shaded area (that carport serves double duty again), working in thin, even layers. Let it cure fully before exposing the vehicle to rain or sprinklers.
Furniture requires a gentler touch but the same principle. Once the lacquer glows again, apply a paste wax formulated for fine furniture, not car wax, which contains stronger solvents. Renaissance Wax or a beeswax blend works beautifully on restored pieces. Buff it to a soft luster with a clean cotton cloth, following the grain. For high-use surfaces like tabletops, consider a thin coat of furniture polish every month.
Maintenance preserves what you’ve achieved:
- Wash cars every two weeks to remove contaminants before they bond to the paint
- Park in shade whenever possible or use a quality car cover for extended outdoor storage
- Dust furniture weekly with microfiber cloths to prevent abrasive buildup
- Keep furniture away from direct sunlight streaming through windows
- Reapply protective coatings on schedule, mark your calendar to stay consistent
- Address water spots, bird droppings, or spills immediately before they etch the finish
Store seasonal furniture pieces in climate-controlled spaces rather than damp sheds or garages. Cover outdoor vehicles properly during hurricane season. Taking care of things the right way means they stay beautiful for generations, exactly how your grandmother would have done it.
Common Questions About Polishing Compound Restoration
You’ve spent the afternoon bringing back the shine on your grandfather’s cherry sideboard or your daily driver, and now the questions start rolling in. Let’s tackle the most common concerns folks have about polishing compound restoration.
Can you restore any faded finish with polishing compounds?
Most clear-coated automotive finishes and traditional lacquered furniture respond beautifully to polishing compounds, but there are limits. Single-stage paints (common on older vehicles) and shellac finishes can be polished, though they require gentler approaches. However, if the finish has cracked, peeled, or worn through to bare wood or primer, polishing won’t help, those need refinishing.
How long will the restored shine last?
With proper protection and care, you’re looking at six months to two years on vehicles and several years on indoor furniture. The key is following up with a good wax or sealant and keeping up with regular maintenance, a quick wax every few months beats a full restoration annually.
Should I just hire a professional instead?
For family heirlooms or show cars, professional detailers bring expertise worth paying for. But most faded finishes on everyday vehicles and furniture are well within DIY capability, especially if you start conservatively with finer compounds and work your way up only if needed.
Can I use automotive compounds on furniture or vice versa?
The chemistry is similar, but automotive compounds tend to be more aggressive since car clear coats are thicker and harder than furniture lacquer. You can use fine-grade automotive compounds on furniture with caution, but furniture polishes are usually too gentle for seriously faded car paint.
The trickiest question is knowing when a finish has gone too far. Run your fingernail gently across the faded area, if you feel the texture of bare wood or see primer showing through on metal, polishing compounds can’t bring that back. That’s refinishing territory, which is a different project altogether.
What trips up most folks is expecting instant perfection. Sometimes a finish that’s been neglected for years needs two sessions with a rest period in between, giving you time to assess whether you’re making real progress or just spinning your wheels. There’s no shame in stopping halfway through, protecting what you’ve accomplished, and coming back to tackle the rest another weekend when the humidity drops and you’ve got fresh energy.
You now have everything you need to bring back the shine to your car’s paint and your grandmother’s dining table, and it turns out, the same skillset does both jobs beautifully. That’s the kind of practical wisdom we cherish down South: one good technique, applied thoughtfully, that preserves what matters to us.
There’s real satisfaction in running your hand over a surface you’ve personally restored, seeing that deep gloss return, knowing you didn’t haul everything to a shop or toss out a piece of furniture that just needed proper attention. Whether you’re keeping your truck looking sharp for Sunday drives along the coast or bringing an heirloom sideboard back to life, these polishing compound techniques give you control over the outcome. They’re not difficult, they just require patience and respect for the process.
The beauty of mastering this restoration work is how it connects to other DIY finishing tips you’ll use throughout your home and garage. Once you understand how to level a surface and restore luster, you’ll spot opportunities everywhere.
So grab your supplies, carve out a Saturday morning, and get to work. Your car and your furniture will thank you, and you’ll have the pride of doing it yourself.